Case Study 5: The secret to flawless healed results
This case study breaks down the incredible difference in healed results when your technique, tools, pigments, and aftercare are all on point.
We’ve all seen it on social media, perfectly crisp immediately-after-a-procedure-results. But what happens when the client leaves, heals and comes back for their follow-up in a few months? Or for their touch-up in a year? There’s nothing worse than your client coming back having lost 50% or more of the work you did, having to redo the entire brows, and, even worse, having her complain to you that her brows have faded after a year. It’s that dreaded phone call and message that we hate.
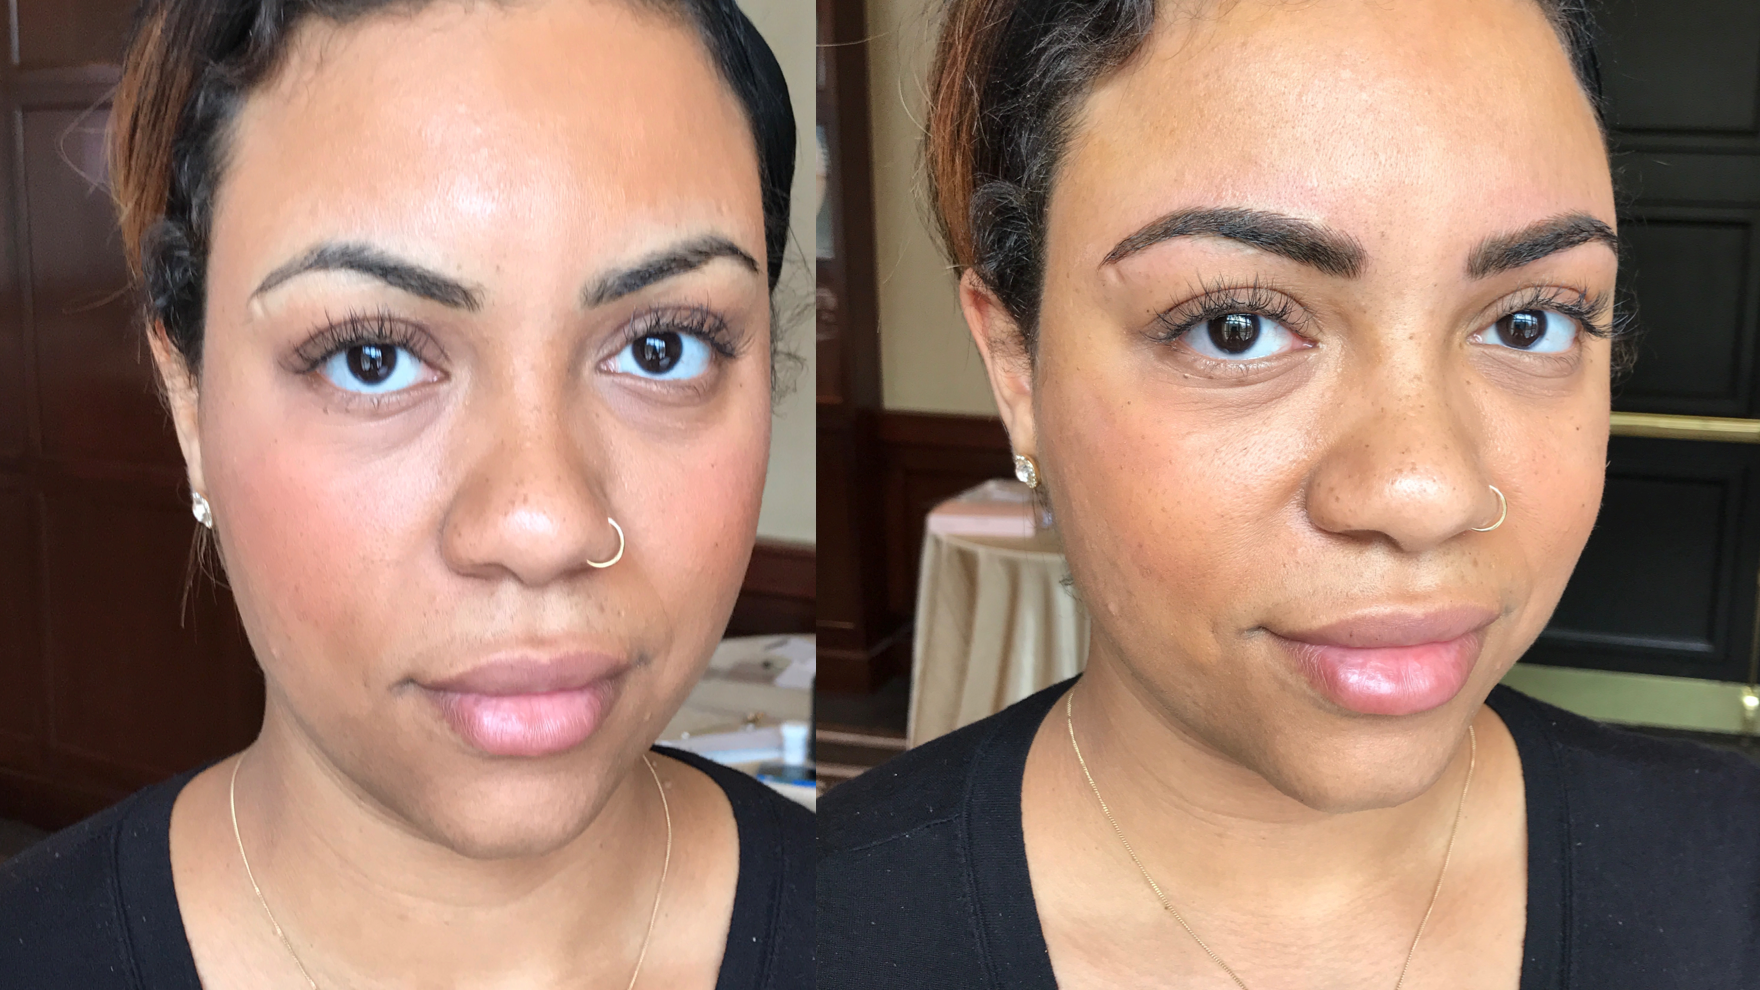
Let’s look at this case study: I did Amber’s brows 13 months ago with Blade & Shade technique using Tina Davies x Permablend I❤️ INK in EBONY. Amber had no previous PMU and she just wanted to give her brows more definition. She already had plenty of hair and a great shape but wanted more impact and fullness. Together we decided to keep the look of loose texture and avoid hard edges and borders. Here’s her pre-drawn shape using the Pro Pencil in Black:

I microbladed her brows first using the U Needle, then added more definition by shading inside the design with 19 Shader.
Watch Tina’s Blade & Shade on Amber

Before Immediately After Procedure

Immediately after closeup
Fast forward 13 months later, they are still as dark as the day they were done!

Healed
Procedure Notes
Method: Microblading and Shading
Needles Used: Tina Davies U Needle Microblade and Tina Davies 19 Shader Microblade
Colour: Tina Davies x Permablend I❤️ INK EBONY
Skin Tone: 32 year-old, Fitzpatrick 5
Skin Type: Apple-firm and strong. Read more about skin types here.
Artist: Tina Davies
Here are the main ingredients to start taking your retention to 90% or MORE:
Technique: Nailing your technique everytime is difficult, but that’s why it is critical that you practice often, and work with exacting precision on each and every client. Practice not only hair patterns, but the angle of the blade, your pressure, and the depth at which you are stroking to get the pigment deposited correctly. Practice often on fake skin, Angie practice pad, or a mannequin head.
Read more about the Top Microblading Technical Skills on our blog posts below:
Tina’s Secret Recipe
See the Sweet Spot
How deep should I stroke?

Blades: Sharp, sterile, and most importantly, comfortable to work with. When I started developing microblades, I noticed that the sharpness and sterility made me much more confident in the work I was doing. But what really changed my brow game, was the comfort and ergonomic considerations that I wanted for my tools. Now I could easily execute the proper depth, stretch, and angle, along with the flowing range of motion needed to create perfect hair strokes for each client for up to 2 hours in a procedure.

Shop Signature Microblades Here and Essential Microblades Here
Learn more about our microblades and which one to choose here.
Pigments: These are a game changer. I can’t say enough how much this Pigment line has changed mine and so many other artist’s retention. Because they are ultra concentrated, I was getting up to 90% retention whereas before I was used to seeing 30-40% pigment loss after the first session.
Coupled with proper technique and the right tools, these pigments were specifically formulated to provide rich, lasting colour that will heal true to tone perfectly in the skin. These pigments only fade out about 10% per year, and become a lighter version without colour shifting.
Read more about the I❤️ INK Pigments on our Pigment FAQs.

Aftercare: Together, with the proper aftercare instructions, this recipe for microblading success will help you to achieve better and improved results. Using the Tina Davies Aftercare, which has antimicrobial and healing properties, will ensure your art is protected against infection and any harmful bacteria that could compromise or impede healing. Read Tina’s full PMU Aftercare Instructions HERE.

Shop Tina Davies Aftercare HERE
Want to learn Tina’s Signature Blade & Shade technique? Enrol in the online course, Blade & Shade today, just click here!
Leave a comment
This site is protected by hCaptcha and the hCaptcha Privacy Policy and Terms of Service apply.