Stretching: The Most Underrated Skill in PMU
Did you know that stretching the skin properly is one of the most important yet most overlooked and under-taught skills in PMU?
Do you have skippy lines or blank and uneven spots? The lack of a great stretch may be a contributor! Unless you stretch properly and get the skin pinned down firmly, the quality of your deposit will be subpar and inefficient. This is the cause of one of the biggest frustrations and complaints heard from PMU artists - not being able to “get the colour in the skin”.
Unfortunately, this skill is under-taught because most of the focus is aimed at the tattooing technique but know that the final tattooing result largely depends on the effectiveness of the stretch of the opposing hand.
What is a good stretch? It’s when the skin is stretched taut like a drum and there is NO BOUNCE in the skin during tattooing.
When a good, taut, stretch is in place, it flattens the skin, allowing the needle to enter easily and create clean and smooth lines, pixels, and shading. What you get is a clean pigment deposit, less trauma, great retention, and shorter working times.
When your stretch is subpar, it causes you to press harder to implant the pigment which in turn, implants the pigment too deep, resulting in poor healed results.
Here’s an example of this theory in everyday life: imagine trying to write down a phone number on a loose napkin. Then, contrast that with writing on a napkin that you hold and pin down firmly. On the loose napkin, your pen will skip around, unable to form smooth numbers and curves while you retrace faint numbers, tugging at the napkin. You will press harder trying to write better but to no avail. Now, contrast that to writing on a flat napkin that you hold down firmly - you’re able to write smoothly and effortlessly, without having to press hard or retrace. Big difference right?
The goal of proper stretching is to create TENSION. Imagine an inflated balloon vs. a deflated balloon. If you were to pop these balloons using a needle, which balloon requires more force/pressure?

The inflated balloon’s “skin” is under a lot more tension, so it will pop as soon as it’s pricked. Only the tip of the needle needs to touch the surface of the inflated balloon, whereas the deflated balloon will require more force/pressure to pop.
The same theory can be applied to any PMU procedure. When you are stretching the skin in taut stretches, you are applying TENSION to the skin and less pressure is required to implant the pigment as only the tip of the needle needs to touch the skin.
When the skin is not fully stretched, more pressure is required to implant the pigment as there is less tension in the skin. As a result, needle insertion will be deeper and uneven. This will cause more pain and trauma to the skin and yield uneven healed results.
“Don’t even touch your needle to the skin unless it’s taut.” -Tina Davies
Here are the signs of good stretching:
- The stretched area is across 1-2cm of skin at a time
- No wobble or movement in the area at the junction where the needle hits the skin
- Pores are flattened out
- Wrinkles are completely flattened out
- The skin is void of bounce during needle movement/impact
- Healed results show smooth, continuous lines/shading with no breaks/holidays
Here are the signs of bad stretching:
- The stretched area is across more than 2cm of skin at a time
- The skin is wobbling/moving as the needle hits the skin
- Wrinkles are not flattened out and in the pathway of the needle
- Healed results show breaks and skips of colour in the skin
- Healed results show bare spots with missing colour
- You are pressing down into the skin rather than across the skin
- Your hand is cramped or fatigued
 Weak colour deposit from bad stretching
 Uneven colour deposit from poor stretching
Here are some top PMU skin stretching techniques to flatten the skin to form a taut surface. Note that these techniques apply to the eyebrows, eyes, and lips universally.
1. Work in small stretches
3-point stretch while shading with The Collective Instructor Tina Davies
The quality of your stretching will determine the quality of your healed work. It is really important to develop or adapt your technique to encompass these stretching habits:
- Isolate your stretch in 1cm - 2cm sections
- The 3-point stretch consists of using two fingers of the non-working hand, and the pinky of the working hand that is holding the microblade or machine.
- Use your thumb and forefinger OR thumb and middle finger of the non-working hand to stretch while anchoring your pinky of the working hand on the brow bone. This way, your pinky will help you stabilize your working hand while stretching.
- Adjust your finger position and move the stretch as you enter each new section. You can also adjust your sitting position to allow for a better stretch. For example, when working on the front of the brow, you can adjust your seat position to be on an angle and stretch on an angle to allow more room for your pinky fingers to sit.
- Use the client's brow bone to get a better stretch. You can pull the ends up and forward onto the brow bone for better stretch and stability.
- Mature skin will require more stretching than younger skin since it is looser. Ensure you extra-stretch well so that the skin is taut.
 The 3 point stretch during microblading with The Collective Instructor, Tina Davies
 The 3 point stretch during microblading with The Collective Instructor, Tina Davies
When the 3-point stretch is done properly with microblading, you can instantly see the strokes in the skin. Look for the proper depth into the upper dermis, which I call the “sweet spot”.
Pro Tip: The “sweet spot” looks like even-depth paper cuts that may have pinpoint bleeding like in the video above. You can pull open and close the skin to look for it.
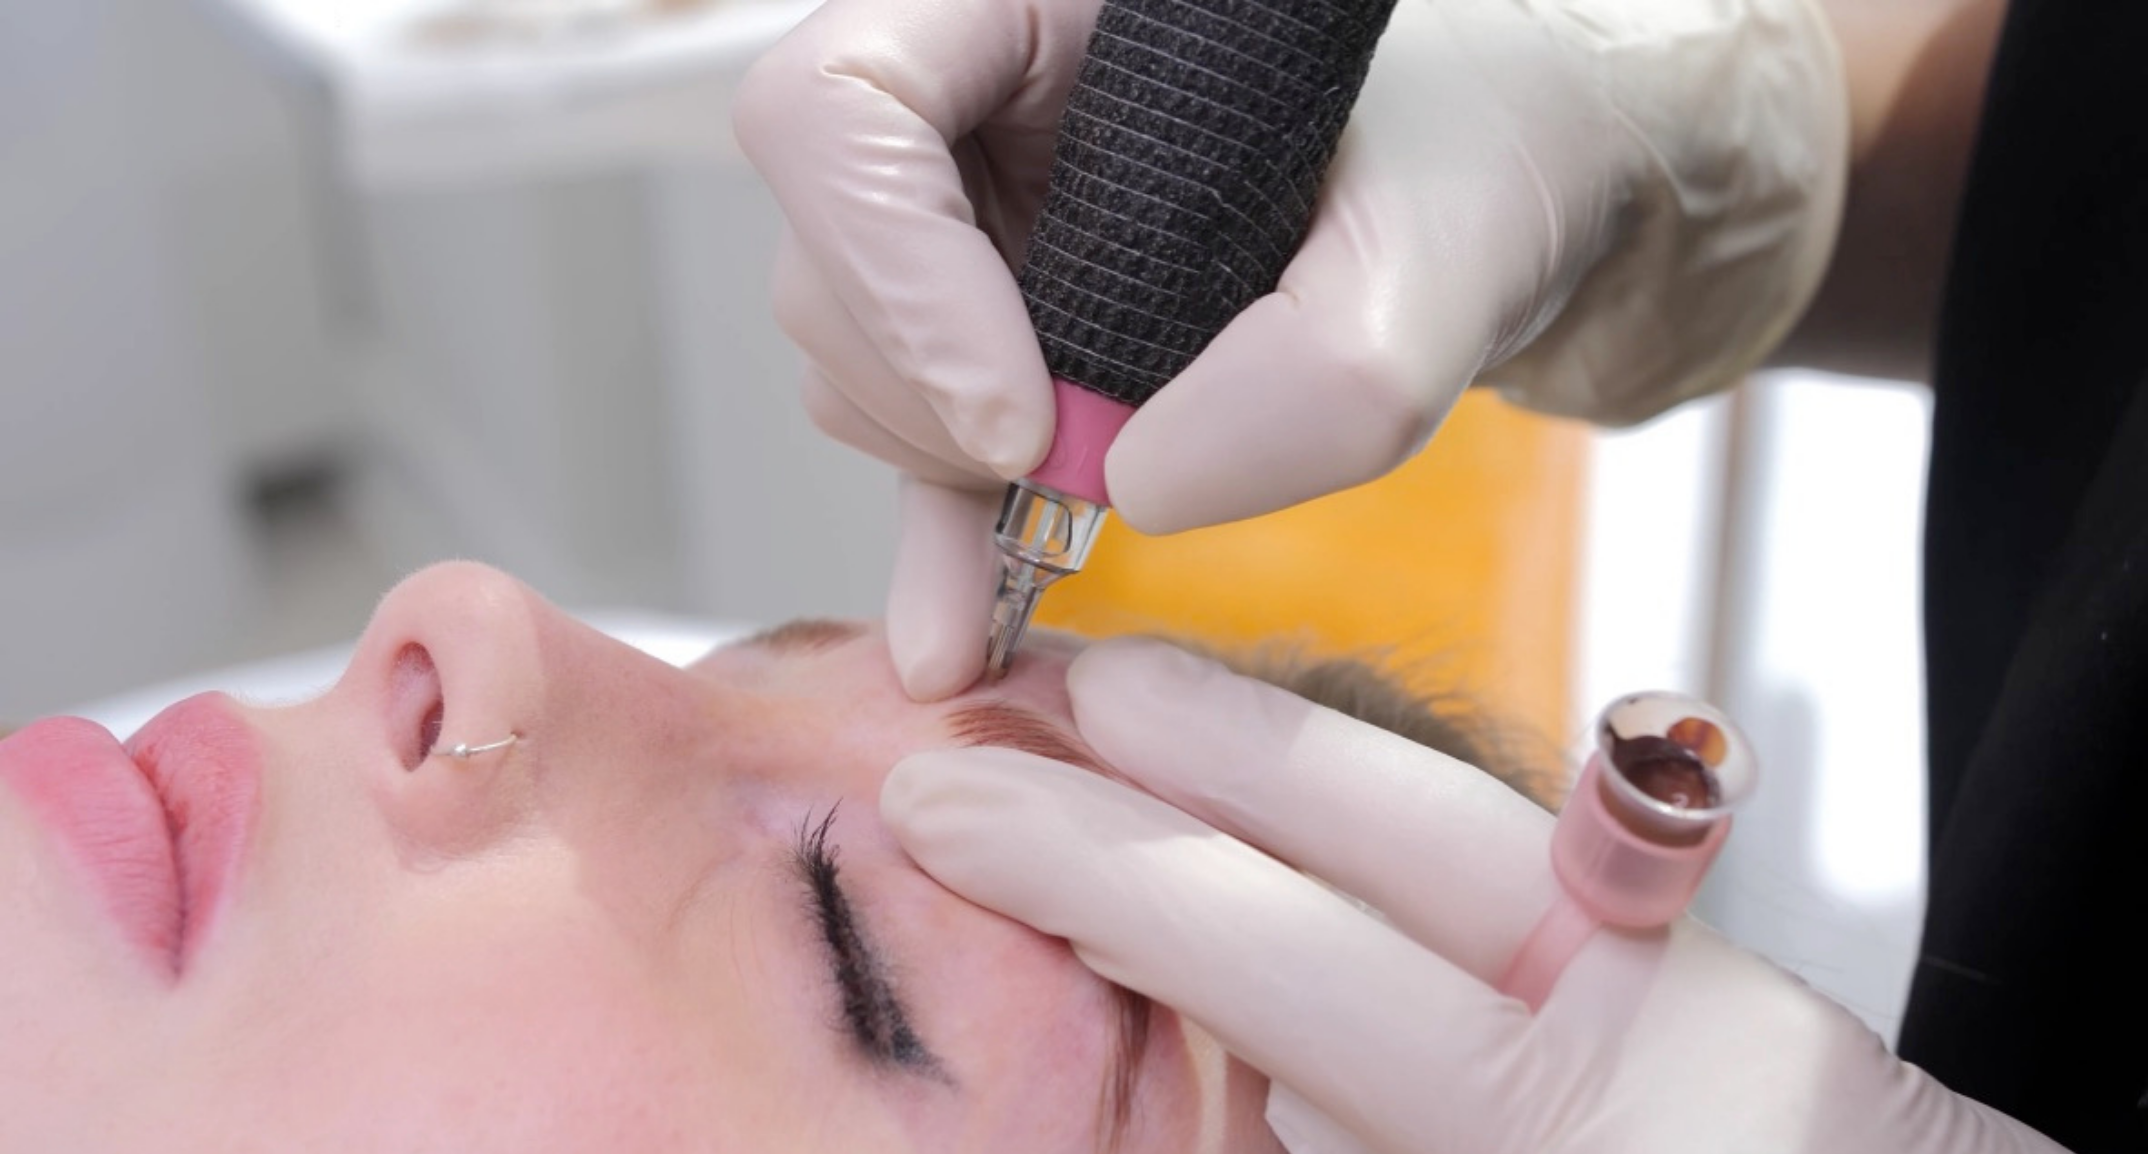
2. Eyeliner: Never let your needle hit the skin unless your stretch is taut like a drum
3 point eyeliner stretching with The Collective Instructor, Tiffany Chen
Eyeliner is the hands-down THE hardest area to stretch. The skin is often lax, wrinkly, and crepe-y, plus it’s extremely intimating to work around a client’s eyes. 90% of problems with retention in this area are due to poor stretch as your needle will only deposit into the epidermis as your needle jumps around wrinkles and lax skin, unable to reach the upper dermis.
- Gain confidence and control of the eyelids. To do this, you must practice and master eyeliner stretching by applying pencil upper and lower eyeliner on many friends of various eyelid shapes and laxity before attempting any eyeliner procedure. Your goal will be to apply pencil eyeliner seamlessly in one go/pass without skippy lines.
- Keep your working window small and place your fingers to stretch and press out any folds or wrinkles or else the pigment will not implant. The skin must be totally flat before the needle touches the skin
- Don't press down on the client's eyeball when stretching. Pull the skin up towards the brow bone area and rest your fingers along the bottom of the brow bone.
- Have the client relax their eyes so you can complete the procedure
- Clean the area well so you can check your deposit
3. Keep your working window small while tattooing the eyebrows
Your “working window” is the area where your fingers come together to flatten the skin. The smaller the window, the less movement in the skin.
If your working window is big with your finger wide apart, there will be more movement in the skin. Be aware of your window at all times, focusing on keeping to no greater than 1cm-2cm sections at all times.
Keeping the working window small during shading with The Collective Instructor, Tina Davies
4. Use cotton or tissue in the stretching hand to prevent slipping while anchoring the skin
Stretching with cotton with The Collective Instructor, Jasmine Diebelius
As soon as blood or fluids are introduced to the skin, it will add an element of slip to the working area, and before you know it, your fingers are slipping and your stretch is losing its effectiveness. To prevent this:
- Use a cotton round or tissue in your stretching hand to prevent “slip” in your fingers and provide a way to quickly clean up the slip/fluids as you work
- Place the cotton or tissue directly under your stretching fingers as you move along the area
- Constantly change out the cotton or tissue so you are always working with a dry one and immediately discard it once it’s wet
5. Use lip guards in the mouth to improve stretching
Poor stretch is usually THE biggest factor for lack of good pigment deposit in the lips. The lip tissue is an extremely soft and wrinkly tissue and one of the most challenging areas to stretch. Lack of good stretching will lead to little to no deposit even if the lips are worked on for hours on end. This is especially important in cases when the lip tissue is thin/lacking collagen.
Work smarter and not harder by using lip guards, lip rolls, or gauze in the mouth to provide additional “firm up” support. It’s also a lot less work on your stretching hand! Lip guards are a must when your client has uneven teeth. Remember that you want to optimize for a flat surface which will be very challenging if your client has uneven teeth.
Remember these handy tips in conjunction with the use of a mouthguard:
- Isolate your stretch in 1cm - 2cm sections, moving your stretch along each section as your work
- Focus on stretching the area flat enough so your needle can enter the skin at 80-90 degrees for minimal trauma
- Adjust your finger positioning and move your isolated stretch as you enter each new section. Oftentimes, people forget to isolate and move.
- Mature lips may require more stretching than younger skin since they may have less collagen. Ensure you extra-stretch well so that the skin is taut.
 Lip Guard
6. Use the “squeeze and pinch” stretch
The “squeeze and pinch” stretch is done by gently pinching the skin together into a roll to create TENSION in the skin. This technique will “bunch” the skin together taut. It is mainly used when tattooing the lip liner when a taut stretch is difficult to achieve.
Squeeze and Pinch lip stretch technique with Collective Instructor Ramona Krusinskiene
As featured throughout this blog post, you’ll be able to find a wealth of knowledge to bring your skills to the next level led by our instructors on The Collective:
- Airbrushed Aquarelle Lip Blush by Ramona Krusinskiene
- Fundamentals of Eyeliner Tattooing by Beauté Academy
- Lip Magic by Jasmine Diebelius
- Blade and Shade by Tina Davies
- Ombré Brows Online by Beauté Academy
Applying these crucial stretching techniques during your next procedures will save you time and frustration, gain more control over the skin and better results.
Here’s a great tip from Beauté Academy’s, Ombré Brows Online Course on how you can practice your stretching techniques by using a cup and some saran wrap!
Or you can even practice your designs on a balloon, as shown by Elaine Campin, in The Perfect Brow course.

Let us know your questions and comments below!

Leave a comment
This site is protected by hCaptcha and the hCaptcha Privacy Policy and Terms of Service apply.