Case Study: Lip Blushing with Magnums

Healed 1 session by Jasmine Diebelius
Learn the process, discover the magic.
Take a sneak peek into our newest lip blushing course, Lip MAGIC taught by Jasmine Diebelius, an award-winning PMU artist & trainer located in the UK. Passionate about colour and shape, her trademark lip techniques are what has made her one of the most in-demand artists in the PMU industry.
Jasmine’s outline and shading techniques allow her to achieve beautiful healed results with natural and delicate definition. In this case study, Jasmine shares how she completed her entire lip procedure using a 7 Curved Magnum needle cartridge. (Yep, you read that correctly!)
“For a long time I was stuck in the ‘one needle’ world and used a 1RL needle grouping for almost all my treatments... My treatment time was always two hours or more. I started working with bigger configurations and I’m very confident that magnums can be the superior option for lips” - Jasmine Diebelius
Using the right techniques, curved magnums can allow you to achieve irresistible lips in half the time. Get ready to see lip magic before your eyes.
Procedure Details

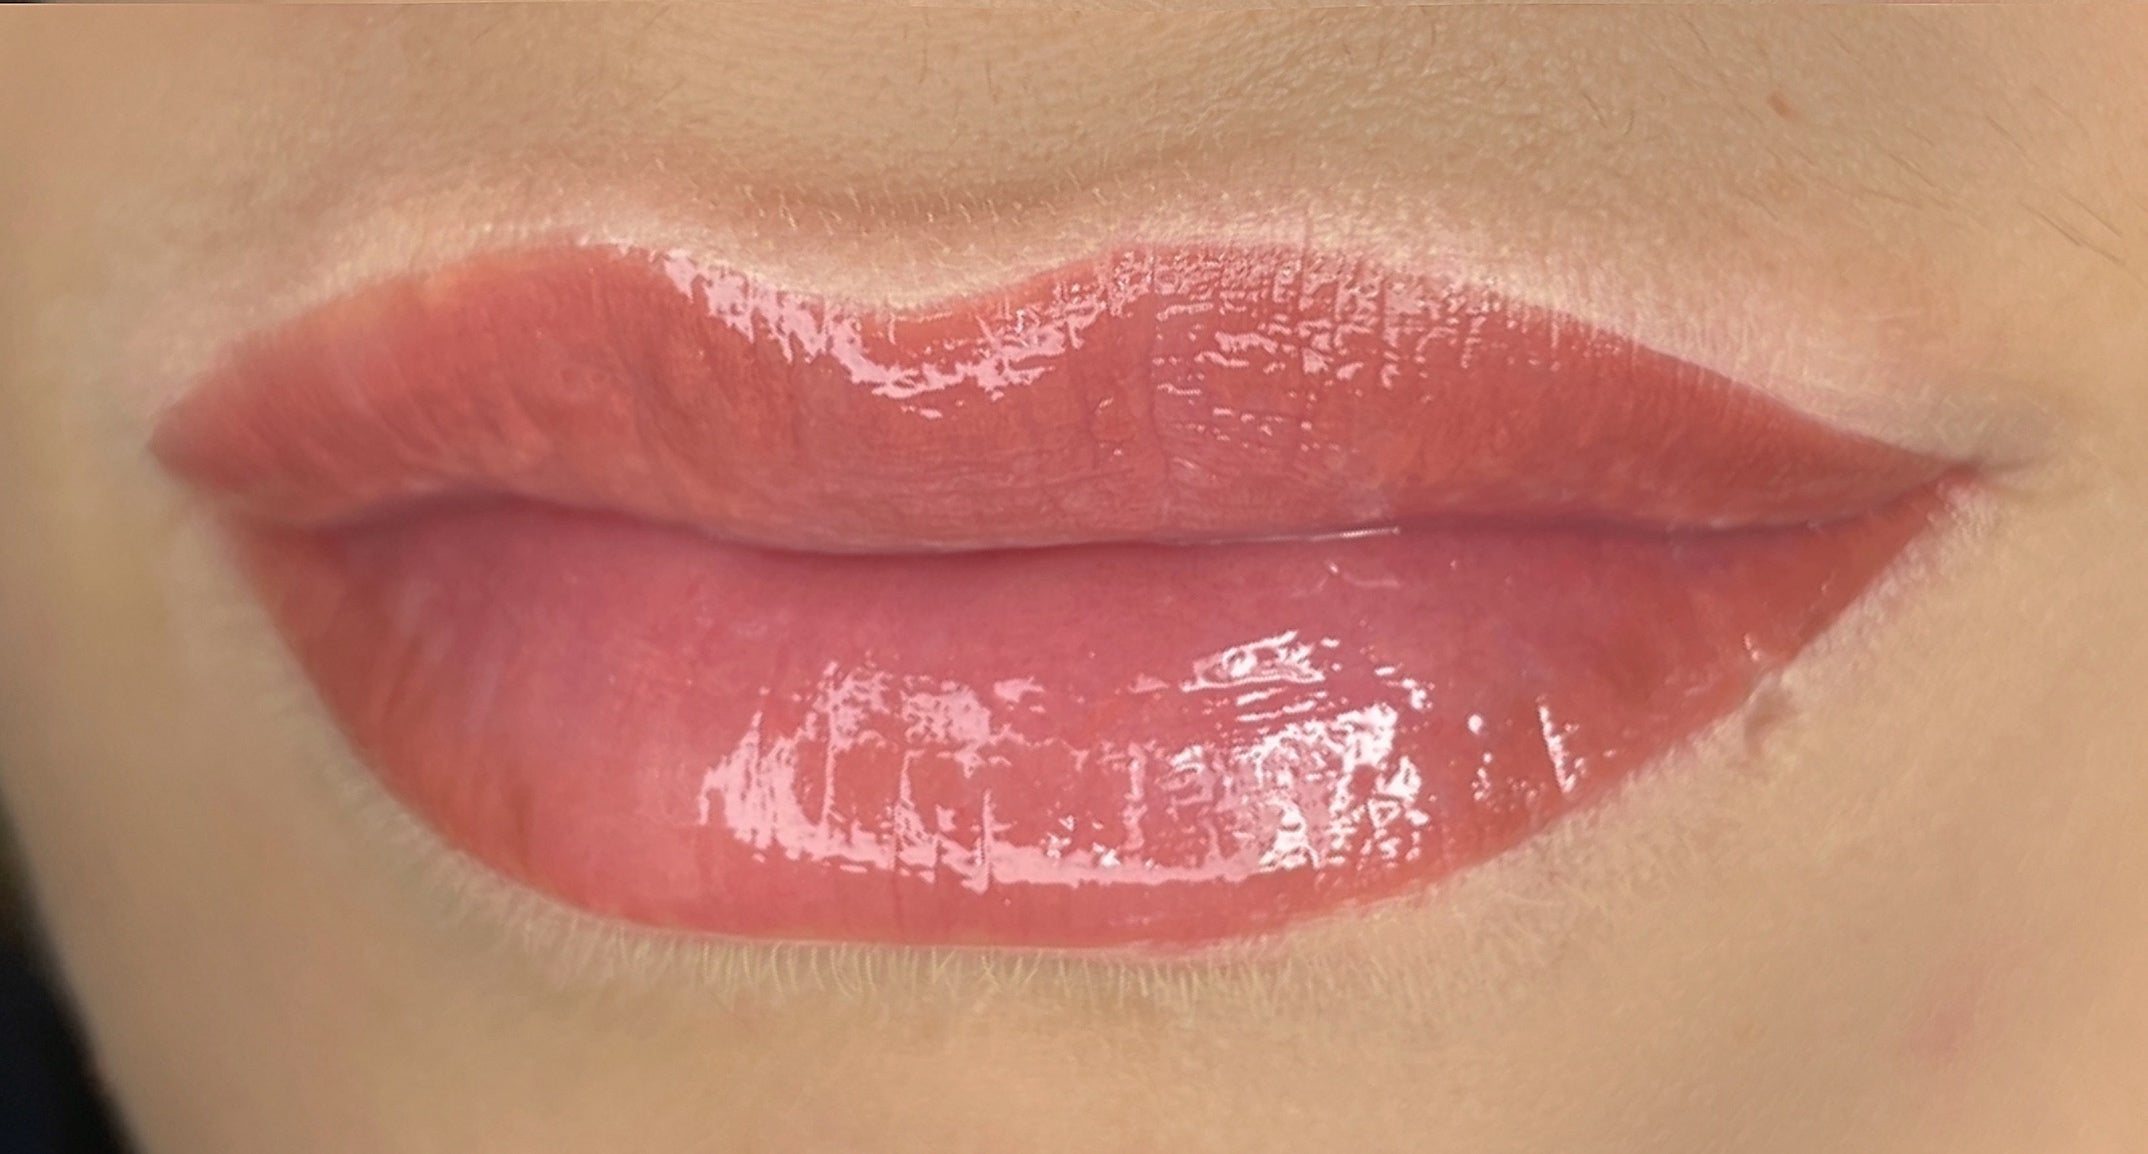
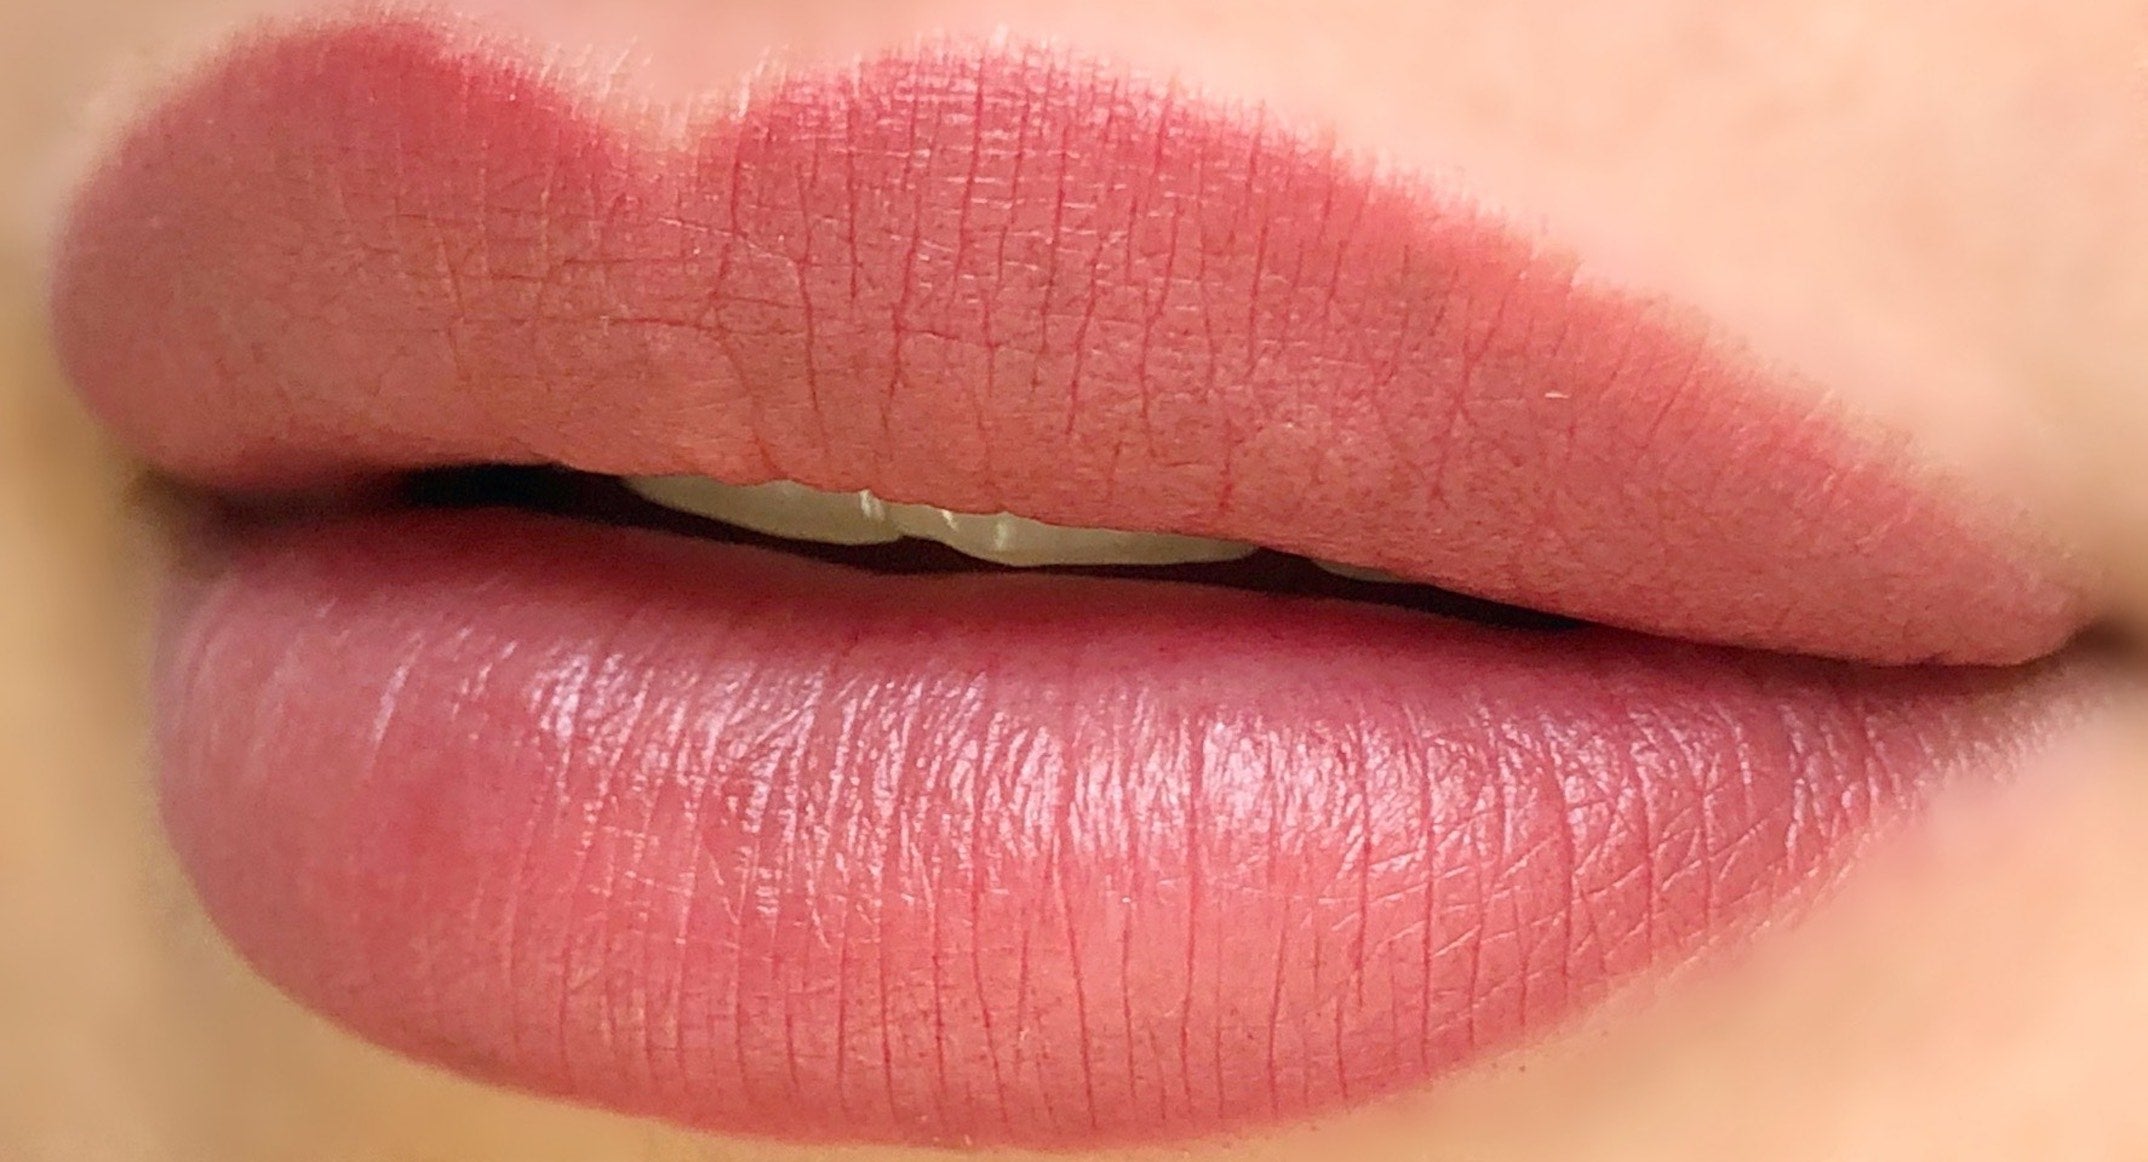
Before, Immediately After & Healed by Jasmine Diebelius
This warm nude is a popular choice for clients wanting some natural definition with a colour that works on a very wide range of skin tones.
Client Goals
My client’s expectation was to create an even coverage over the whole lips. As you can see, the border is scattered with no definite start or end to the lips regarding shape.

Colour Choice
My client had a clear vision of the colour that she wanted, she showed me a warm nude colour (Envy Cinnamon, used on a client she saw on my Instagram page). This then told me the ballpark she wanted to be in colour-wise so I wouldn't waste our time swatching reds, pinks and mauves as these are not the colours she wanted.
After assessing the natural lip tissue and my client’s overall complexion - I decided that if my client wanted a brownish nude colour that she showed me - it would be best to soften the Cinnamon and mix in Nude as well. The reason for this is Cinnamon has more black in the pigment formation than Nude; the natural lip tissue has some light melanin tendencies so I wanted to ensure that the colour healed wasn't too dull and dark once healed. By adding Nude and Cinnamon together this would lighten the value of the colour giving us more room to adjust on the second session if needed once we assess how the colour has taken in the skin.
We swathed Cinnamon, Nude and a mix 50/50 of the both and decided to go for the mix! Both of these colours are from the Envy Lip Pigment Collection. I did also like Dusty Pink but I feel this wouldn't be enough alone to achieve what we wanted, also too pink.

Envy Cinnamon 50% & Nude 50%
Plan of Action
During the consultation, we discussed the colour choice, expectations, and the process. At this time I applied the numbing cream and took ‘before photographs'.
I did my pre-draw on my client’s lips with concealer and a flat brush. We took our time drawing the design on as this was my client's main area where improvement was needed. Super important to set your shape in place with translucent powder before tattooing for a good stretch!
I then completed the outline to fix the shape in place which gave me my template to begin the shading. I then began my shading throughout the whole lips using 7CM needle.

Technique & Needle Choice
I used a 7CM needle for the outline. I used this needle because I have good stability to create a line and also this area needed attention to create the definition! I kept the 7CM needle in to complete the shading, this lip was a good candidate for the magnum needle due to minimal wrinkles with a wide size.
Keeping my needle at an 80-90 degree angle, I am able to control the pigment flow allowing the pigment to float into the skin for a soft gradual look and minimizes trauma to the skin. Dropping your machine angle will allow for more pigment flow therefore more saturation but causes more trauma to the skin.
I started my first pass with a pendulum-shading motion. Once completed, I put my secondary numbing on. Working in small sections at a time, doing one full section, wipe and check and determine whether I need to do another layer or if not, I will move on to the next section. I then changed back to 1RL to fill any small gaps I had.

7 Curved Magnum Needle Cartridge
Skin Type & Fitzpatrick
My client is a young Fitzpatrick 3 skin tone with a medium value lip with slight melanin visible. I get a lot of Fitz 3 clients with medium lip tissue - it’s best to choose medium value colours in this case for optimum results and good heals.
Procedure Notes
Age: Early 30’s
Fitzpatrick: 3
Skin Type: Normal - No filler
Colour Choice: Envy Cinnamon & Nude
Sessions: 1 session
Machine: FLUX by Microbeau
Needle: 7 Curve Magnum by Tina Davies
Method: Pendulum
Healed Result

Healed after 2 session at 6 weeks
Review Session
Only minimal adjustments were needed as they retained so well! You can see a light patch on the left upper lip next to the cupid bow - we focused here first then did a light layer over the whole lips once using a 7CM again.
Learn Jasmine's Lip Magic Techniques
Join Jasmine on this exciting journey as she teaches you her magical techniques to creating beautifully healed results with natural & delicate definition while maximizing speed. Her trademark lip techniques have made her one of the most sought-after artists in the PMU industry.
Lip MAGIC Course Outline

In this course, Jasmine guides you through 2 full procedure videos, 34 demonstrational videos, and countless how-to visuals that’ll help perfect your craft. Watch her conduct live procedures using a 1RL for fool-proof pigment implantation as well as a 7CM needle for maximum coverage efficiency.
Practice alongside her latex demonstrations, step-by-step pre-drawing videos, and lip shape instructions to finesse your skills. Learn exactly what pigments, machines, needles, and tools Jasmine uses for every client’s individual need.


We’ve also included 8 case studies packed with healed results and downloadable forms, sheets, and pro tips to help you successfully achieve your client’s goals, every single time.

Refine your skills and learn new techniques for outlining and shading lips in half the time you’d normally take using both single and magnum needles.
Get ready to create magic!

Leave a comment
This site is protected by hCaptcha and the hCaptcha Privacy Policy and Terms of Service apply.