Case Study: Healed Lips on Fitzpatrick 4 Client
 Healed
It’s all in the healed results. Immediately after shows your art, healed results show your skills.
In this case study, PRO Team artist, trainer, and PMU specialist, Sara Baseri, talks about how she chooses the right colour for her Fitzpatrick 4 client with cool, darker lips and shows you the real healed results after just 2 procedures - no filters, just raw PMU art.
 Sara Baseri, @sara.baseri.pmu
Client Goal

My client came to her appointment with the goal of achieving fuller lips with an even and symmetrical lip outline.
She had lip filler 8 months prior, but they had lost some definition and fullness, leaving the lips looking slightly unbalanced. Making her lips symmetrical was very important to my client.
She was looking for a light pink, even colour, and no harsh outlines.
Pro Tip: Many clients have a difficult time describing their desired colour. To make things easier, ask them to bring their favourite shade of lipstick to get a better understanding of what colour they feel comfortable with.
Client Skin Type
My client is a medium skin tone, Fitzpatrick 4, with a normal to combination skin type. Her lips had cool, darker undertones. I needed to ensure I added extra warmth to neutralize the coolness in her lips. Her natural lip colour was quite dark, so I needed to select a darker value pigment in order for it to be seen atop her natural pigmentation.
Design Approach
She was looking for fuller, defined lips with an all-over even colour and no harsh lip outline, the Airbrushed Aquarelle Lip technique will allow me to achieve this!
Colour Choice
My client’s desired colour was a light pink, however, with her natural lip having cool, darker undertones, if I chose a pigment that is too light it would heal too cool looking. Lighter colours that have more titanium dioxide (white pigment) would not mix well with her natural lip skin colour.
Before the procedure, I explained to my client the colour limitations due to the natural coolness of her lip skin tone by sharing how the colour is tattooed under the dermis layer so the natural lip skin and the pigment will mix together. Instead, I would create a custom mix in order to create a natural soft pink look.
To select a colour, I use a combination of different techniques to help the client envision the colour, such as, showing the Colour Chart, a pigment drawdown chart, and using the Tina Davies Lip Blush Stains & Lip Pencils.
 Tina Davies Lip Pigment Colour Chart

Pigment Drawdowns
For this client, I decided on a combination of Tina Davies Soft Red, Flame & Wine.
Ratio: 6 drops Soft Red, 6 drops Flame and 3 drops Wine.
Flame for the warmth to neutralize and cancel the cool tones in her lips, Soft Red for a warm pinky tone, and Wine for a deeper pinkier tone for added depth.

Soft Red, Flame and Wine Lip Pigments
Note: No two clients' lips are going to heal the same. You can use the same colour combination on 2 different lip tones and it can look completely different. With factors such as type and level of melanin in the skin, your final result is a combination of lip skin and pigments used.
Pre-Care
If you want the perfect lip results there are lots of things involved which are not only the artist's responsibility but also the client's. It’s to share with your clients how important your pre-care and post-care advice is to achieving the best-healed results.
Prepare your canvas (in this case, lips) by educating your clients with providing the Pre-Post care instructions and asking your clients to STRICTLY FOLLOW for great outcomes. By providing pre-care instructions, you limit bleeding and skin sensitivities during the treatment. Remember, excessive bleeding and sensitivity during the procedure will dilute and expel the pigment colour which leads to poor results.
Pre-care advice:
- Exfoliate lips and keep them moisturized 2 weeks before the procedure.
- Get plenty of rest and drink lots of water to hydrate before the procedure.
- L-lysine is the perfect supplement to have before and after the treatment.
- Antiviral medication Valtrex, Zovirax, or other anti-viral pre and post-procedure is highly recommended to reduce the occurance of a cold sore outbreak.
- Avoid wearing lipsticks leading up to your procedure, and if you must, use a creamy lipstick and never matte because it has lots of alcohol that can dry out the lips.
Pre-Draw
From my pre-draw I like to use concealer to outline the lips using a flat brush and an angled brush for the cupid’s bow, this helps ensure I do not go beyond the lip border.
I always pre-draw the lips while the client is sitting up as when they lay down gravity can change the shape of the lips. . However, if you prefer to pre-draw while the client is laying down make sure to double-check before beginning to tattoo by asking them to sit up. You can then assess the symmetry and correct it from there.
Pro Tip: Add translucent powder to”set” the shape and keep your pre-draw intact. This will prevent the drawing from smearing off on your gloves while you’re tattooing.
 Pre-draw symmetry analysis
Colour Consultation Tips: Depending on my client, sometimes during the consultation I will outline the lips using a Lip Pencil and apply a very sheer layer of the matching Lip Blush Stain mixed with a bit of Vaseline. This will allow my client to preview the colour and feel more comfortable booking a procedure.
Pre-draw using Lip Pencil and a light layer of Lip Blush Stain
Plan Of Action
In order to achieve the soft outline my client was looking for, I chose a 0.30mm 1RL needle cartridge because it is slightly bigger in diameter so it is easier to place the colour and slowly whip shade towards myself, moving section by section. The whip shading technique allows for a softer outline.
Be sure to watch your hand pressure to ensure it is not too heavy or the outline will be dark and thick.
I continued using the whip shading motion to fill in the lips, building up the colour, completing a total of 3 passes.
 Immediately After
Technique

Ensuring you have a good stretch is important for implanting the colour evenly. Focus on stretching smaller areas of the lip and work in sections, adjusting your stretch as you go along. SLOW DOWN, work with a lower machine speed and hand movement as this will allow for more pigment to deposit into the skin. My goal is to get as much colour in as I can during the first pass while the client is most comfortable. Take your time and move section to section for even results. The key to lip procedures is patience, don't rush the procedure.
When selecting a needle, it is important to take into consideration your client's skin type, age, and needs. Since taking Jasmine’s Lip MAGic course, I’ve started using Magnum needles and it has completely changed my life. Not only does it reduce your procedure times, but it enhances the comfort of your client. Don’t be afraid to learn new techniques, perfecting your skills is what will make clients want to book your services.
 Tina Davies Curved Magnum Needle Cartridges
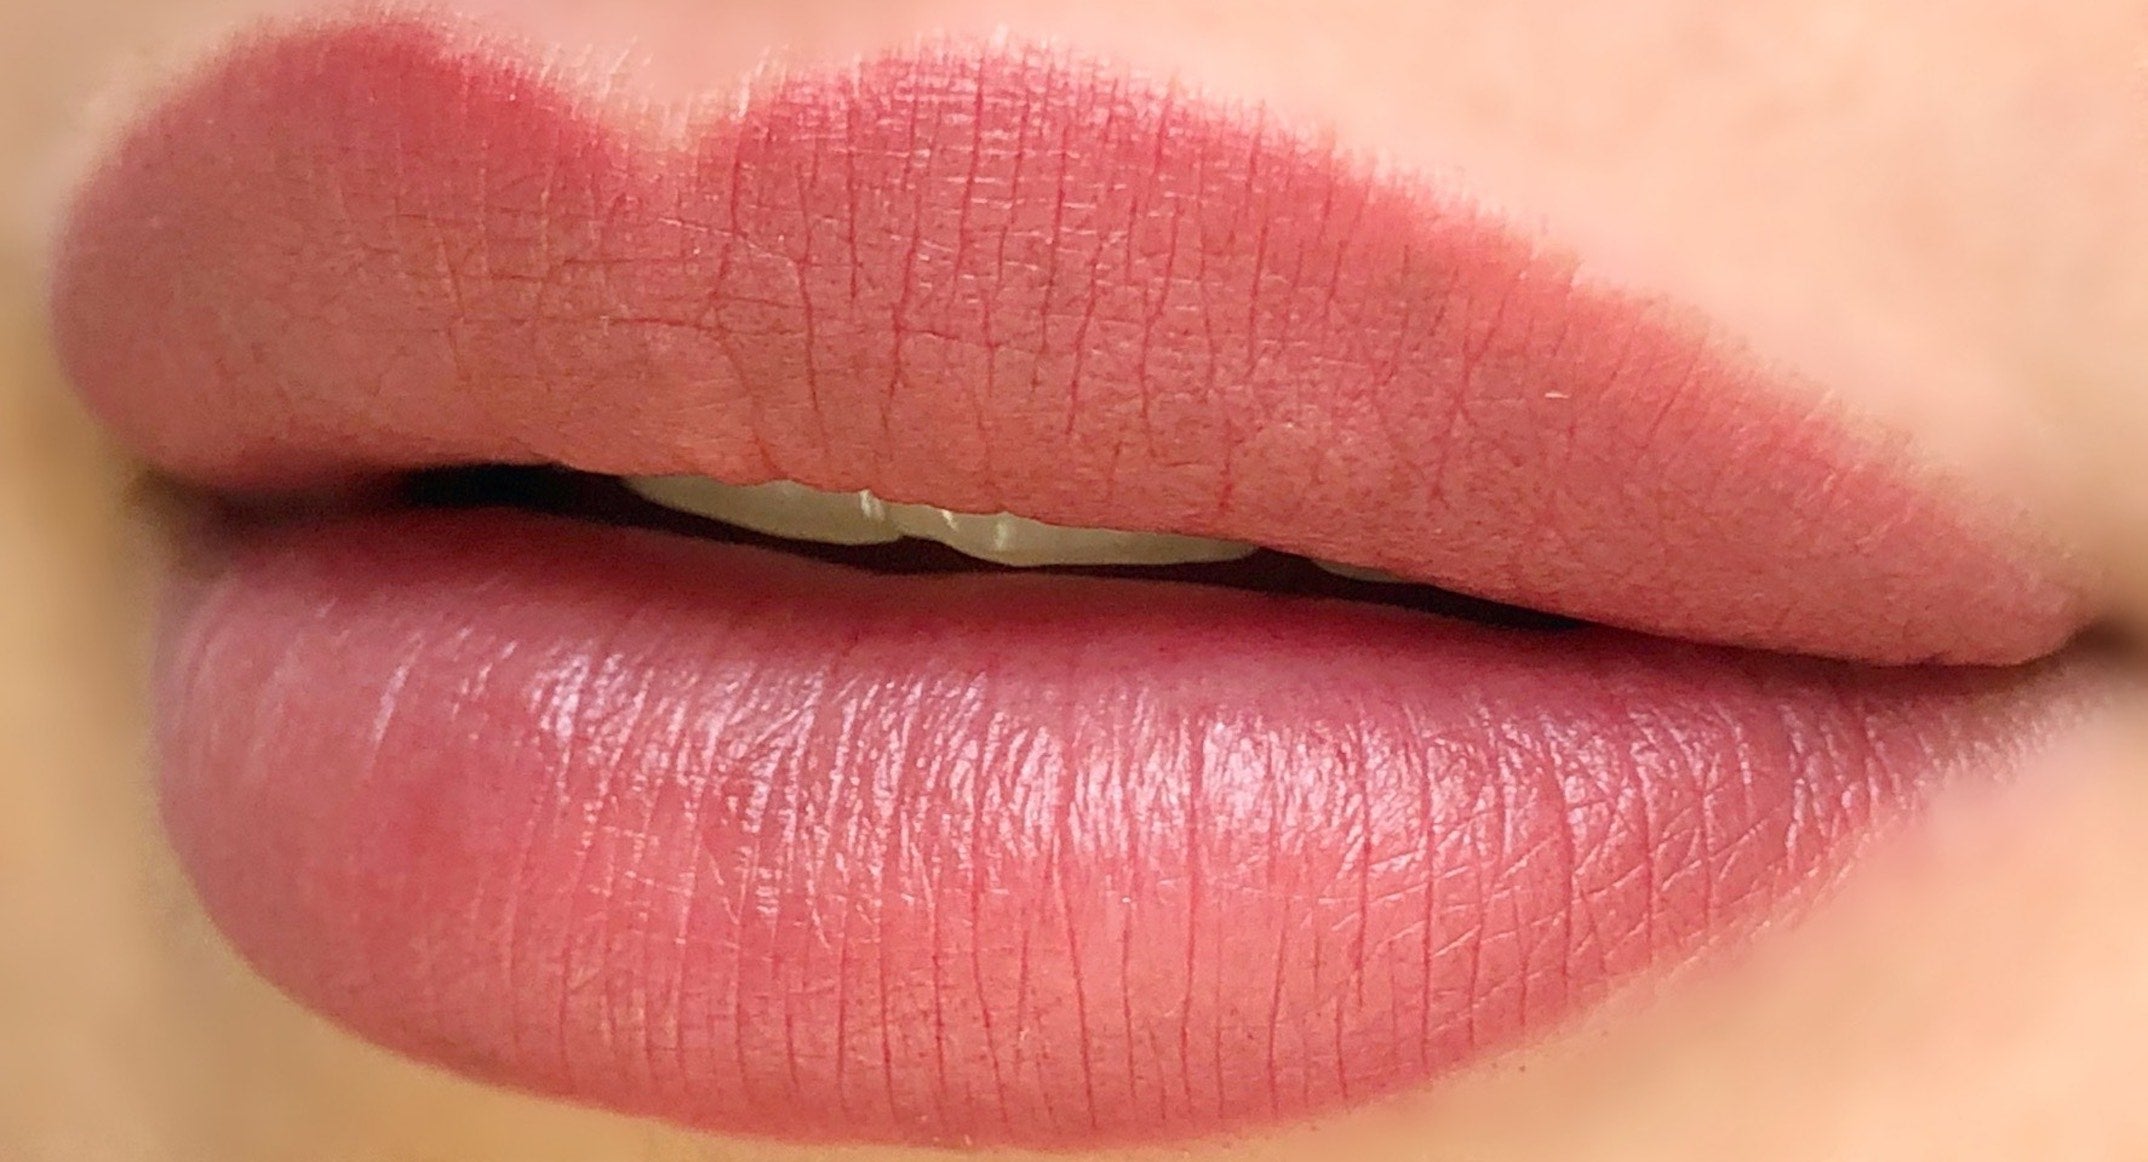
Healed

Healed after 1st session, glossy
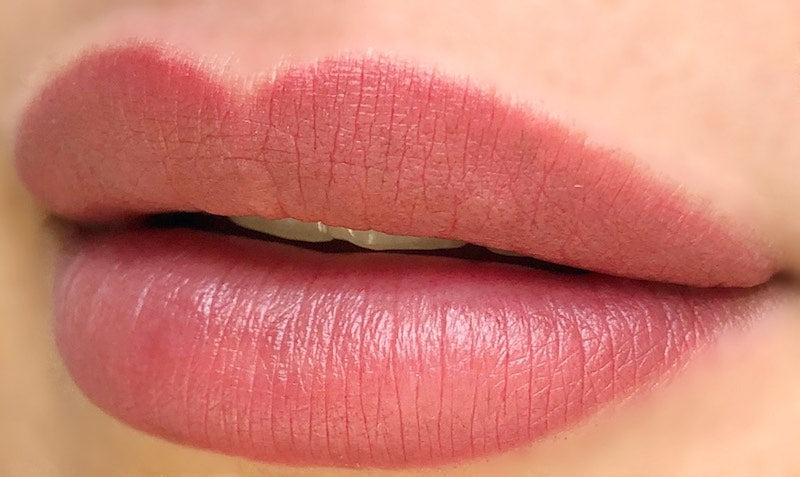
 Healed after 1st session, matte
My client, unfortunately, had not decided to take the cold sore medication as she never experienced an outbreak before, however, she developed a cold sore after eating some spicy food. This is why I instruct every client to take pre-and-post procedure advice. Quickly she started taking the medication and thankfully, it did not affect her healed results.
Touch Up
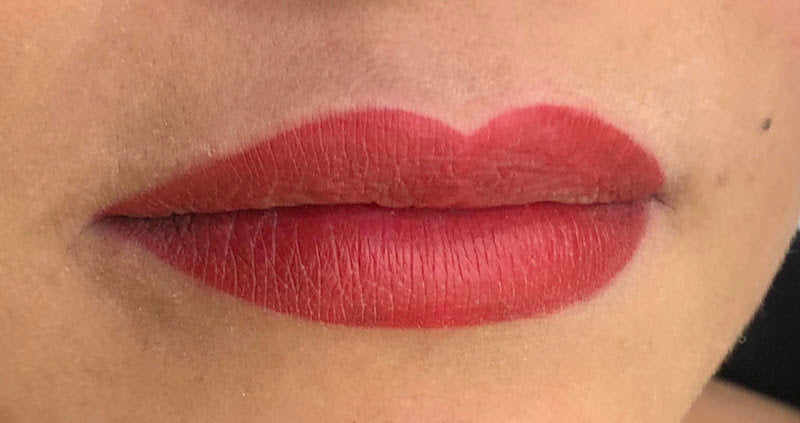
 Healed 2 Sessions
Upon touch-up her healed results looked great, there was no patchiness in the lip, however, she wanted to add more depth and colour mainly to the middle of the lip and not around the lip border. I completed 2 passes using the whip shading technique and the same colour mix to deepen the colour focusing in the middle of the lips to build up the colour.

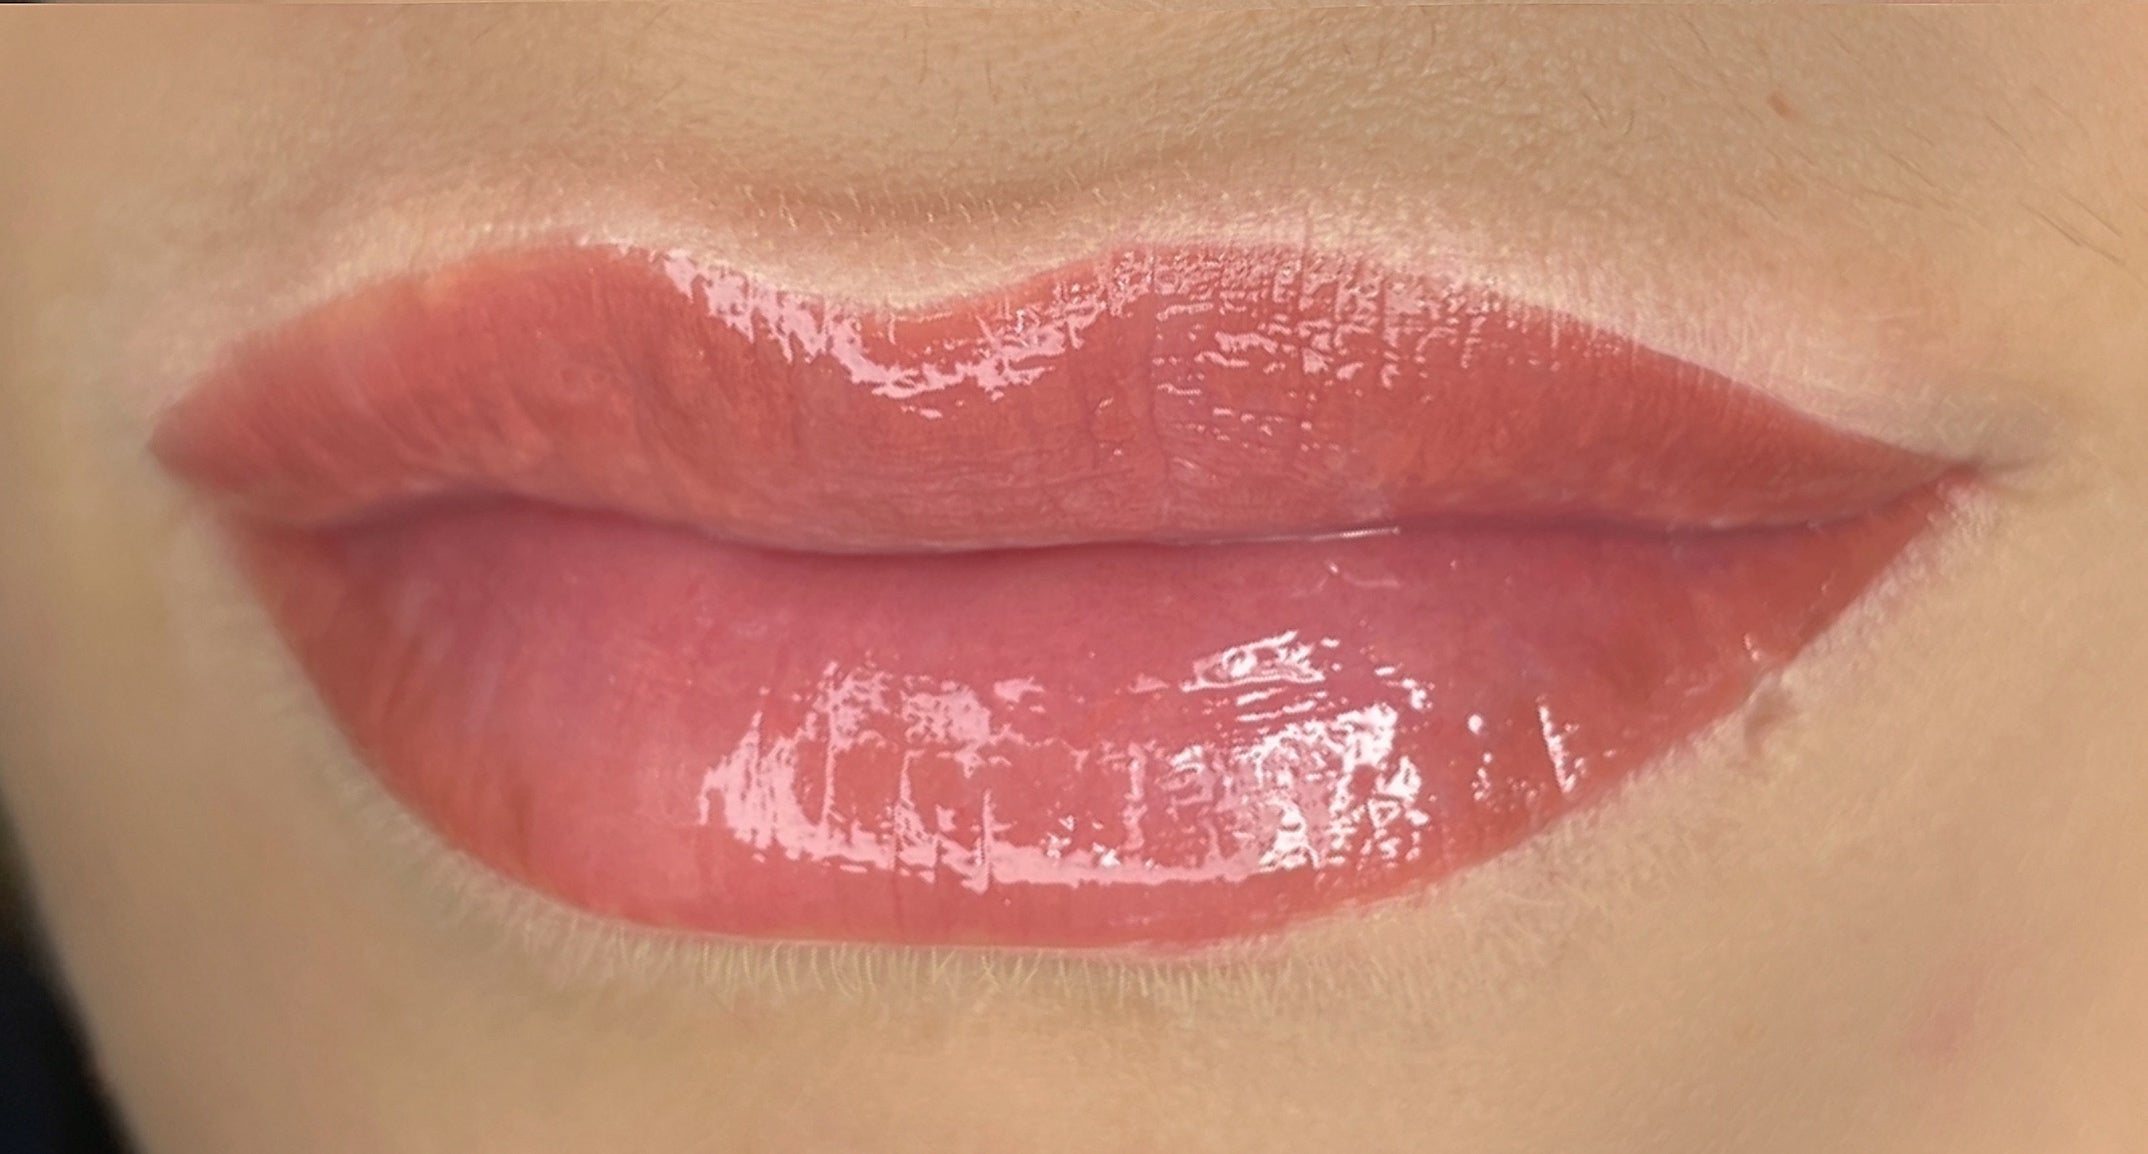
Healed 1.5 years later
Procedure Notes
Age: 35
Fitzpatrick: 4
Skin Type: Normal to Combination
Lip Undertone: Cool
Colour: Tina Davies I Love Ink Soft Red + Flame + Wine Lip Pigments
Method: Whip Shading
Needles: 0.30mm 1RL

Artist Notes
As artists, it is important for us to share the realistic results clients will receive immediately after and healed. The more we share this, the better client expectations will be, and less chance for an unhappy client.
If you are a passionate artist who wants to be the best, you will need to use the best for the best result. I appreciate Tina Davies. She seriously made my life a lot easier and less stressful by using her products as she always provides the best products and tools in the PMU industry. Pigments Set, Colour chart that comes with the collection, Cartridges, Pencils... Since 2018 I felt much more confident in my career by starting to use her Products.
Tina Davies changed the PMU industry with her products. It became easier with her I Love Ink pigments, then a little bit later with gorgeous lips l Love Ink collection and cartridges which was a game-changer. With the lip collection, lots of my struggles were solved as it comes with a colour chart for easy colour selection, with matching lip blush stain to let your client try their desired lip colour before committing to the procedure. Pre-draw with the matching lip pencil.

The Curved Magnum Needle solved my struggle like magic. It was another revolution in the lip blushing procedure which has not only cut my procedure time in half, but I noticed my clients don’t feel pain and discomfort compared with a single needle. The results come in softer and with more even colour and texture. Thanks, Tina again for your curved magnum and creating the right tools and products. It is so important, especially these days. With lots of products and tools on the market, it can be confusing but I learned by investing in buying and trying different brands… Save your money and time by using the other artist's experience.
 Shop Tina Davies Curved Magnum Needle Cartridges
About Sara

International cosmetic tattooist and trainer, a specialist in eyebrows, lips, and eyeliner in New Australia, New Zealand, and Iran. Sara has over 9 years of experience within the cosmetic tattoo industry and education. Sara’s passion for cosmetic tattooing is teaching beginners and also advanced training in the art of cosmetic tattooing.
Sara studied for a bachelor's degree in English translation, computer graphic design, and business Information systems. She worked in real estate and the sales industry but in the end, Sara decided to follow her passion of focusing on cosmetic tattooing.
“I always felt naturally drawn toward the arts. I began taking numerous classes for certification to start my own business. I took my career to the next level by getting my Master's Certificate in Russia with Elena Nechayeva in 2018. I love to keep learning in this field, in order to keep up with the latest trends and constantly improve my skills, to give my clients the best results that they deserve.”
Be sure to stay tuned for our next case study!
Leave a comment
This site is protected by hCaptcha and the hCaptcha Privacy Policy and Terms of Service apply.